Citrix Access Gateway is a secure application access solution that allows users to access applications from anywhere. I will illustrate how I configure end-to-end ICA communication to back-end Citrix resources via the NetScaler Access Gateway.
Citrix Components required:
- NetScaler Gateway
- NetScaler Load balancer
- Delivery Controller
- StoreFront server
- Resources
- Public SSL certificate
- Internal SSL certificate
Configuration
- A public DNS entry should be configured for devgw.mycompany.com which maps to a public IP.
- A NAT will then be configured to map the Public IP to the Access Gateway IP on the Firewall.
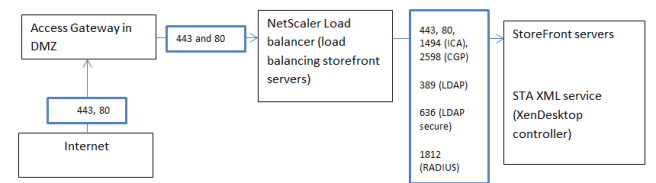
Single DMZ ports configuration (Access gateway in DMZ between firewalls) – Note that the load balancing server is on same appliance as the Access gateway. For logical illustration and traffic flow I have separated them.
Citrix component configuration
Citrix StoreFront server
We need to configure and prepare Citrix Storefront server for External access.
To use a single FQDN for external use and internal use, create an internal DNS entry devgw.mycompany.com to point to an IP address for the load balancer which is load balancing the StoreFront servers and change the base URL to match the chosen FQDN. (if you are not load balancing storeFront servers, then still create a DNS entry internally to the StoreFront server)
Note – You would also have a public DNS pointing to Devgw.mycompany.com (hence the single FQDN)
Still on the StoreFront server, Go to the NetScaler Gateway settings on the left and add a new NetScaler on the right.
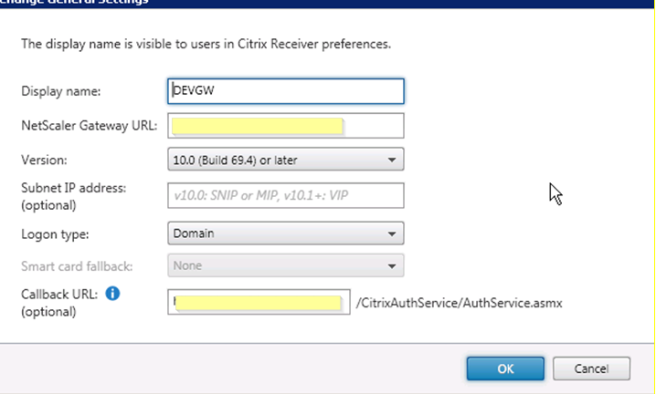
Give it a name in the “Display name”
NetScaler Gateway URL: this is the FQDN of the URL already chosen above.
Callback URL: This is optional if you want to use Smart Access features or End Point Analysis. This will point back to the Access gateway server.
In 2 arm modes or when the Access gateway is in the DMZ it will not be accessible from the internal network (StoreFront server). The work around is to create another 2nd Netscaler Gateway VIP called a “Callback VIP” on the SNIP (same IP range) that is connected to the internal network with just the SSL certificate bound to it. (No need for other policies) and then a host file on the SF server that will be used to point the FQDN URL to the 2nd VIP (CTX137385)
Further firewall rules might need to be configured from the StoreFront servers to the callback VIP you have created in addition to the other ports we mentioned earlier. Ensure port 443 is talking from StoreFront server to callback VIP if using the above work around.
Under the Stores node, create a new store and enable remote access for this store and select “No VPN Tunnel”
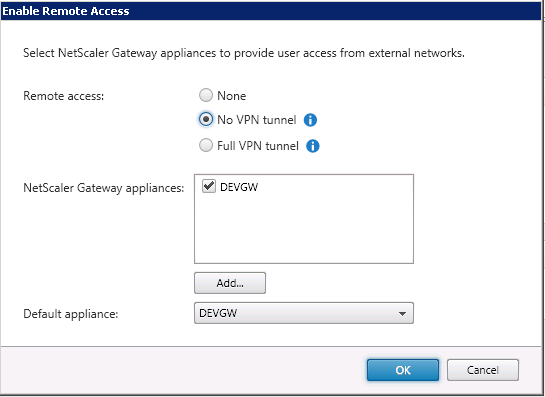
select the default appliance which we created in the previous step.
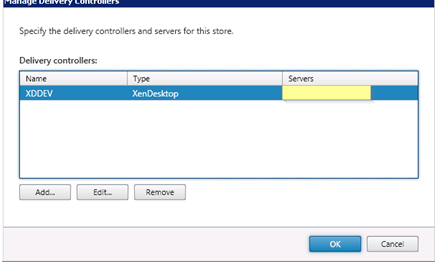
Still under Store node, go to manage delivery controllers and define the Citrix Delivery controllers that will broker your VDI resources.
Under NetScaler Gateway node, click on Secure Ticket Authority
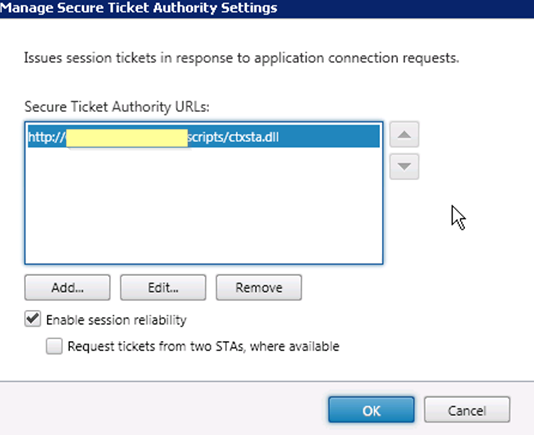
The secure ticket authority is responsible for issuing session tickets in response to connection requests for published applications and desktops. These tickets form the authentication and authorization for access. The Access gateway talks to the STA server (XenDesktop controller or XenApp controller) for which server IP, port number, hostname, resource the user should access.
IMPORTANT – The STA servers defined here must also match the STA servers that we will define at a later stage in the Access Gateway Virtual server late.
You can also enable session reliability in the step (I will not discuss session reliability is this article, but if you wish to use it ensure port 2598 is allowed as mentioned earlier)
Beacons Node
Beacons are sites that tell receiver which way it is talking to the Store (internal or external) by seeing which site it can access. By default it will try the internal first. – You don’t need to configure anything here.
Citrix Access Gateway
We will now configure the Citrix Access gateway component on the Netscaler.
The below explains how to create an ICA proxy access gateway
First we need to create an Access Gateway VIP
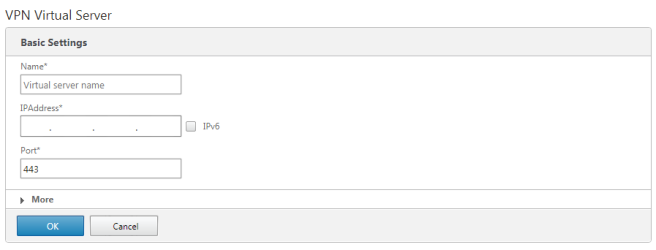
Public DNS and NAT
The IP address you use above will have a firewall NAT from the public IP address to the VIP IP. A public DNS entry will be created which maps to the public IP address to the chosen URL
Certificates
Once the VIP is created we need to bind a public facing server SSL certificate

Authentication
Under Authentication we need to configure the Authentication methods. In my case I am using RADIUS as Primary authentication and LDAP as secondary authentication (I will go through the steps to configure LDAP and RADIUS in another post)
Profiles
I also recommend using the NSTCP_DEFAULT_XA_XD_PROFILE (prior to using this profile, you need to test and ensure your environment will not be effected with the TCP parameters within the profile)

STA servers
For XenDesktop, this will be the Delivery Controller’s in the site. For XenApp 6.x this will be the Zone Data collector in the farm. The list of STA’s must match the list configured on the site settings in Storefront.
Note – if the STA shows as DOWN when using the hostname, try using the IP address instead.
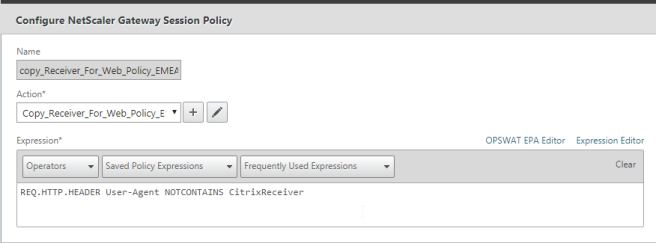
Session Policies
You need to create session policies for web browser based access (receiver for web) and a policy for receiver.
Go to NetScaler Gateway > Policies > NetScaler Gateway session policies and profiles > session policies.
Click Add
Name: Give the policy a name
Action: To be created (I did one earlier)
Expression: REQ.HTTP.HEADER User-Agent NOTCONTAINS CitrixReceiver
Click the + under Action
Click on Client Experience and modify the settings depending on your corporate requirements.
Split Tunnel – OFF
Clientless Access – Allow
Plug-in Type – windows/MAC OS X
Credential Index – depending on what order you have set authentication (this is used for SSO)
click Security tab
Enable default authorization action
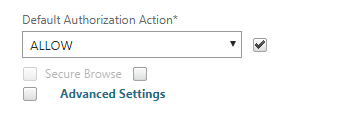
Click on Published Applications
Enable ICA proxy (No SSL VPN)
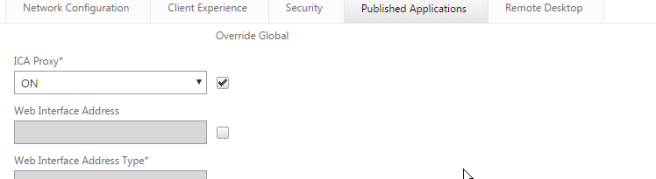
In “web interface address” enter the load balancer IP address if you have configured a load balancer or enter the single StoreFront server (I hope you have configured a load balancer!)
Note – you can verify if the load balancer functions by going straight to it. You will likely get a SSL certificate error because the SSL certificate on the StoreFront server will not match the IP address in the HTTP header in the browser
Define the domain to use when users go to the Access gateway page under “single sign-on Domain”
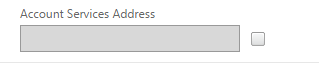
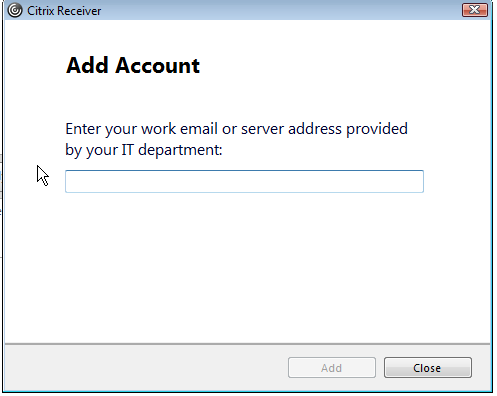
Note – “Account services Address” is only used for email discovery for Citrix Receiver plugin
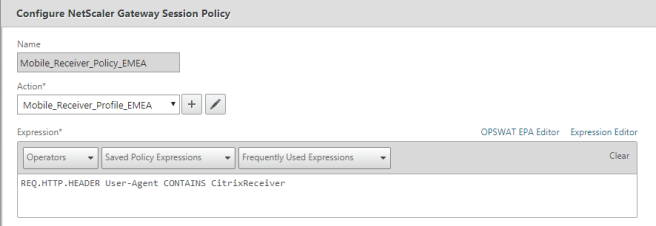
You now need to go ahead and create the session policy for receiver
The properties above will likely work (you need to test) with the receiver session policy, you may want to enable the “account services address” for email discovery on citrix receiver
You also need to change the policy expression to
REQ.HTTP.HEADER User-Agent CONTAINS CitrixReceiver
Once you have all that done, you should now be ready to test access to your Citrix Xendesktop/XenApp environment.
Good Luck!
